
Label Bubbles & Peeling: A First Inspection Guide
Before smoothing a bubble or replacing a label, document what changed and when. This first inspection guide helps you preserve useful evidence and choose the next investigation.
THE SHORT ANSWER
Bubbles, broad peeling and lifted edges are observations, not root causes. Record their location, timing, label and container lots, and the application and exposure sequence. Keep affected samples and suitable comparisons. Use that evidence to decide what to investigate; do not assume a fixed cleaning, warming or adhesive change will solve every case.
Separate raised areas, lifted edges and broad release
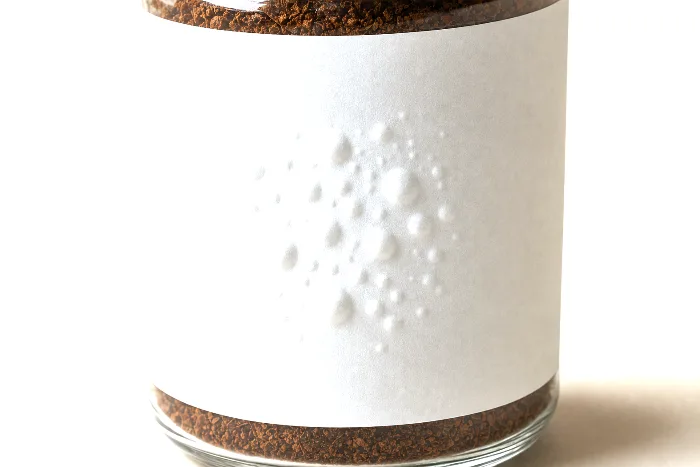
Describe a raised area within the face separately from an edge lifting away or a label releasing broadly. Record any wrinkles, print changes or visible separation between layers. If you cannot tell which layer has changed, preserve the unit for supplier inspection rather than naming the mechanism from appearance.
Photograph the whole container and a close view with a scale where practical. Record the inspected quantity and affected quantity, the SKU and the time. Do not puncture or flatten the only failed sample before recording it.
Build a timeline instead of ranking guesses
| First observed | Useful comparison | What remains unresolved |
|---|---|---|
| Immediately after application | Comparable units from the same setup and lots | Placement, contact, equipment and construction may all need review. |
| After filling, chilling or storage | Records before and after that actual step | Timing narrows the investigation but does not identify one cause. |
| After shipping or handling | Retained references and affected shipment samples | Package contact, exposure and prior condition need to be compared. |
| Only in one SKU, roll or container lot | A documented comparison that changes that factor | Other differences may still explain the pattern. |
Separate application conditions from later use. Record surface temperature and moisture state at application, the actual conditioning interval, and subsequent exposure. “Cold storage” alone does not explain what happened during labeling.
Choose a controlled next step
Start with the approved specification and process record. Identify missing information before changing several variables. Ask the converter which comparisons can distinguish the proposed explanations, then agree sample counts, conditions, observation intervals and acceptance criteria.
Do not substitute a universal 24-hour wait, an unapproved solvent or warming procedure for supplier guidance. Check the exact construction’s application requirements and the product’s permitted handling. Retain original samples alongside the planned trials.
For the complete investigation record and a worked comparison, use why labels will not stick. The adhesive guide separates application, conditioning and service requirements. Avery’s troubleshooting guidance lists several possible adhesion contributors; a listed remedy must still fit the actual product and construction. Avery adhesion guidance
If the lifted area is an edge on a curve
Record the container’s actual label-zone geometry and the finished label dimensions. Identify whether the edge contacts bare container or an overlapping printed/finished label face. A narrow diameter can make construction selection demanding, but edge location does not prove that stiffness is the only issue.
Do not add overlap automatically: some designs intentionally use a gap or partial wrap. Use the curved-container and seam guide for an original tolerance example and the measurements to request. Qualification must still use the actual surfaces and application process.
Keep observations separate from responsibility
A clean hand-applied comparison can be useful, but one successful label does not clear the material or prove the line is at fault. A failed comparison also does not establish a supplier defect. Differences in pressure, placement, sample condition or exposure may matter.
Share the evidence, agreed specification and process deviations with the responsible technical teams. Mark proposed explanations as hypotheses until supported. Keep the decision about cause separate from commercial responsibility.
Send a first inspection packet
- Container supplier item, material, lot and filled or empty state.
- Label roll/lot, construction reference, artwork revision and finish.
- Photos, affected and inspected counts, defect locations and observation times.
- Application setup and the sequence of storage, transport and product exposure.
- Retained failed units and comparison samples, clearly identified.
- What changed, what was held constant and what is still unknown.
Use your quality process to decide containment and release of affected stock. A visual troubleshooting guide cannot authorize shipment or establish a universal acceptable defect level.
Turn the finding into a controlled reorder
Once a change is supported, record the revised construction or process, trial evidence and approval owner. Review related SKUs for the same conditions rather than assuming every product needs the same change. Retain the approved sample and revision with the order.
For a new custom roll-label request, upload artwork, review detected attributes and confirm the available specification. Keep the container, seam and service requirements with it; artwork alone cannot establish physical suitability.
Frequently asked questions
Why are bubbles appearing in my label?
A raised area within the label face can have several explanations. Record its location, timing and the construction and exposure history. Preserve the sample, including any visible layer separation, and use controlled comparisons before selecting a cause or remedy.
Why are the edges of my label peeling up?
Edge lift may involve construction, contact surfaces, geometry or application conditions. Identify the exact edge and whether it contacts the container or an overlapping finished label face. For curved containers, check the seam dimensions and representative trial results.
Should I smooth or puncture label bubbles before inspection?
Document and retain representative failed units before disturbing them. Smoothing or puncturing the only sample can remove useful evidence. Follow the responsible quality team’s procedure for investigation and disposition.
How long should I wait before judging adhesion?
Use the supplier’s conditioning guidance for the exact construction and agreed trial conditions. There is no universal 24-hour approval interval for every label. Record both the inspection time and any later exposure relevant to the product.
Does a clean-surface test establish who caused the problem?
No. It provides evidence from those conditions. Compare label and container lots, application, conditioning and exposure, and document uncontrolled differences. Cause and responsibility require a reviewed investigation.
What information helps a label supplier investigate bubbles or peeling?
Provide the label and container references, artwork and finish, photographs, affected and inspected counts, observation times, application setup, exposure timeline and retained samples. Distinguish observed facts from proposed explanations.