
Label Sizes: Inch/mm Chart & Measuring Guide
Choose label dimensions from the container you will actually use. Compare inch/mm sizes, measure the usable panel, work out the wrap seam, and carry a controlled specification into your label quote.
THE SHORT ANSWER
Measure first, then choose the label size. For a straight cylindrical wrap, width = circumference − agreed gap, or circumference + agreed overlap. Measure the usable panel height separately. Check a full-size mockup and approve the actual material and application before ordering.
What is a standard label size?
There is no universal size for a product label. A size chart can help you compare options, but the finished dimensions must fit the actual container, artwork and application process. A bottle's stated capacity does not tell you its diameter, taper or usable label height.
For a round label, specify diameter. For a rectangle, specify finished width × height and units. Keep those dimensions separate from bleed, liner width and roll diameter. Printer media and carrier label formats have their own requirements; a familiar 4 × 6 in shipping format is not a default product-label size.
Label size chart: inches and millimeters
Use these dimensions as paper-mockup options, not promised fits. Confirm the real container and supplier requirements before ordering. Multiply inches by 25.4 to convert to millimeters.
| Example shape / use | Finished size in inches | Finished size in mm |
|---|---|---|
| Circle for a lid or flat panel | 2 in diameter | 50.8 mm diameter |
| Circle for a lid or flat panel | 2.5 in diameter | 63.5 mm diameter |
| Circle for a lid or flat panel | 3 in diameter | 76.2 mm diameter |
| Rectangular front or back label | 3 × 2 in | 76.2 × 50.8 mm |
| Rectangular front or back label | 4 × 3 in | 101.6 × 76.2 mm |
| Square panel label | 3 × 3 in | 76.2 × 76.2 mm |
| Shipping media example; check printer and carrier | 4 × 6 in | 101.6 × 152.4 mm |
A jar lid's overall diameter may include a rim that should not carry the label. Measure the intended flat area. For a bottle or candle jar wrap, calculate from the measured label panel instead of choosing a width from the container's ounce rating. Use the wine-bottle sizing guide for that specific container workflow.
How to measure a bottle, jar or flat panel
- Identify the production container. Record its supplier, part number and revision. Use representative samples; note visible variation, mold seams, texture and raised details.
- Find the usable label panel. Measure between shoulders, base curves, rims or other obstructions. Agree top, bottom and side clearances instead of using the entire container height.
- Measure the intended wrap path. Use a flexible tape or paper strip without stretching it. Mark where the ends meet, lay it flat and measure. Check the top and bottom of the intended panel for taper. For a true circular cylinder, circumference C = π × diameter D.
- Choose the seam. Decide whether the label leaves a gap, overlaps, or covers only a front panel. Have the converter and application-line operator approve the allowance and dimensional tolerances.
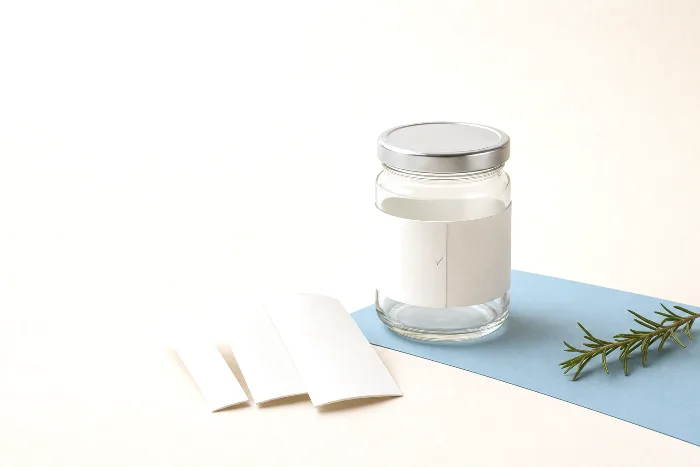
- Make a full-size mockup. Print at 100% scale, check a known dimension with a ruler, cut the proposed outline and place it on the container. Review fit, seam location, readability and alignment.
- Qualify the production construction. A paper mockup checks layout. It does not establish adhesive performance, label release or machine application. Approve the actual material and a line sample before the production release.
For a flat panel, measure its usable width and height and agree an inset from each edge. For front-and-back labels, document both outlines and their placement separately. Record measurements in one unit system, and avoid rounding back and forth between inches and millimeters.
Wrap label size: worked gap and overlap examples
Suppose a measured cylindrical panel has an 8 in circumference and the proposed label height is 2 in. These are planning inputs, not dimensions inferred from a bottle capacity.
- Gap example: 8 − 0.125 = 7.875 in width. Finished size: 7.875 × 2 in, or 200.025 × 50.8 mm.
- Overlap example: 8 + 0.125 = 8.125 in width. Finished size: 8.125 × 2 in, or 206.375 × 50.8 mm.
- Height example: a 2.25 in usable straight panel with 0.125 in reserved at both top and bottom leaves 2 in. Agree those clearances for the actual container and line.
The decimal conversions are exact arithmetic, not manufacturing tolerances. Let the supplier set the drawing precision and allowable variation. An overlap also requires the adhesive to perform on the printed or finished label surface it contacts.
Use the label size calculator for an initial cylindrical wrap estimate. Carry the result into a reviewed drawing; the calculator does not approve the seam, material or line setup.
Full wrap, partial wrap or front-and-back labels?
- Wrap with a gap: one label leaves an intentional exposed strip. Record the target gap and where the seam sits.
- Wrap with overlap: one end covers the other. Reserve the covered artwork area and test the overlap bond.
- Partial panel: one smaller label covers part of the container. Check the visible edges and placement tolerance.
- Front and back: two components have separate sizes and quantities. Confirm their relationship and the application's placement control.
“Full wrap” can be interpreted differently. Put the width, seam treatment and placement drawing on the specification. Keep important text and codes away from the covered seam and other obstructed areas.
Sizing labels for tapered and curved containers
A rectangular paper mockup may lift, wrinkle or sit unevenly across a taper. A small front label and a long wrap can behave differently on the same container. Compare measurements at the top and bottom of the intended panel and show the supplier where the label must sit.
A tapered wrap may need a curved outline developed for that surface. Compound curves and squeezable containers may need a different label area, construction or application method. Avery Dennison's conformable-film guidance describes material options for complex bottle shapes; it does not qualify a particular finished label.
Request a supplier-reviewed dieline and a physical trial using the actual container and construction. A flat artwork file or on-screen preview alone cannot prove fit or adhesion. Use the material qualification checklist to agree test conditions and acceptance criteria.
Specify shape, corner radius and application orientation
Write width × height with a drawing that identifies the artwork's top. Also state which dimension runs along the feed direction on the roll. The unwind direction guide explains how to record the leading artwork edge and printed-face orientation.
There is no universal corner radius. Keep the approved outline intact and ask the converter to propose any manufacturability change for approval. Do not assume a die will silently round sharp artwork corners. Review cut quality, liner condition and dispensing using the cutting method and finished-format guide.
Finished label size is measured at the cut line. Bleed extends outside that line; safe areas sit inside it. Use the supplier's dieline and bleed requirements, including any separate artwork or finish layers.
Compare size options on the same production brief
Size can change material use, layout, tooling and finishing costs. A smaller label is not guaranteed to produce a lower total quote. Ask the converter to compare two workable sizes using the same material, SKU quantities, finish, roll requirements and delivery plan.
Approve fit and readability before trading dimensions for a lower price. Keep one-time tooling charges separate from repeating production costs, and check whether a changed size requires new artwork or a new application trial. See how to compare label quotes.
Prepare an enterprise label-size brief for packOS
Start a label quote with existing artwork or enter known dimensions manually. Review the proposed size and shape against the approved container specification. Share any unresolved measurements or trial requirements before production.
- Container supplier, part number and measured label panel.
- Finished width × height or diameter, units, shape and corner radius.
- Gap or overlap, placement drawing and approved dieline revision.
- Material and finish, or conditions the supplier must qualify.
- Quantity per SKU, artwork revision and front/back component counts.
- Applicator or co-packer, unwind, roll limits and approval owner.
- Release quantities, required dates and delivery locations.
Keep these details together in the label SKU schedule and supplier comparison worksheets. For repeat orders, confirm whether the container, artwork, construction or application line has changed.
Start a label quote or use the enterprise roll-label buying guide to prepare the full specification.
Frequently asked questions
What is a standard label size?
There is no universal product-label size. Choose finished dimensions from the actual container panel, artwork and application requirements. A size chart offers mockup options, not a guaranteed fit.
How do I convert label size in inches to millimeters?
Multiply each inch dimension by 25.4. A 3 × 2 in label is 76.2 × 50.8 mm. State the units and finished cut size on the approved drawing; bleed and manufacturing tolerances are separate.
What size label fits an 8 oz or 16 oz jar?
Capacity alone is not enough to choose a label. Measure the usable panel and wrap circumference on the actual container, check for taper, and approve a full-size mockup followed by a production-material trial.
How do I calculate a wrap label width?
For a circular cylinder, circumference equals π × diameter. Subtract the agreed seam gap or add the agreed overlap. An 8 in circumference with a 0.125 in gap gives a 7.875 in label width. Measure label height separately.
Should a wrap label overlap or leave a gap?
Choose the seam deliberately with the supplier and application-line operator. A gap leaves an exposed strip; an overlap covers part of the artwork and needs a suitable adhesive bond to the surface beneath it. Neither allowance is universal.
Can a rectangular label fit a tapered container?
A small front label may behave differently from a long wrap. Check the intended panel with a full-size mockup. A tapered wrap may need a curved outline and a different construction; approve fit on the actual container before production.
Does label size include bleed?
Finished label size describes the cut outline. Bleed extends beyond that outline and the safe area is inside it. Follow the supplier’s drawing and file requirements rather than adding bleed to the ordered label dimensions.
Does a bigger label cost more to print?
Size affects layout, material use, tooling and finishing, but smaller is not always cheaper overall. Compare workable dimensions using the same construction, SKU quantities, roll specification and delivery schedule.